
DIY - Tealight Holders
- Niena

- Apr 1, 2024
- 3 min read
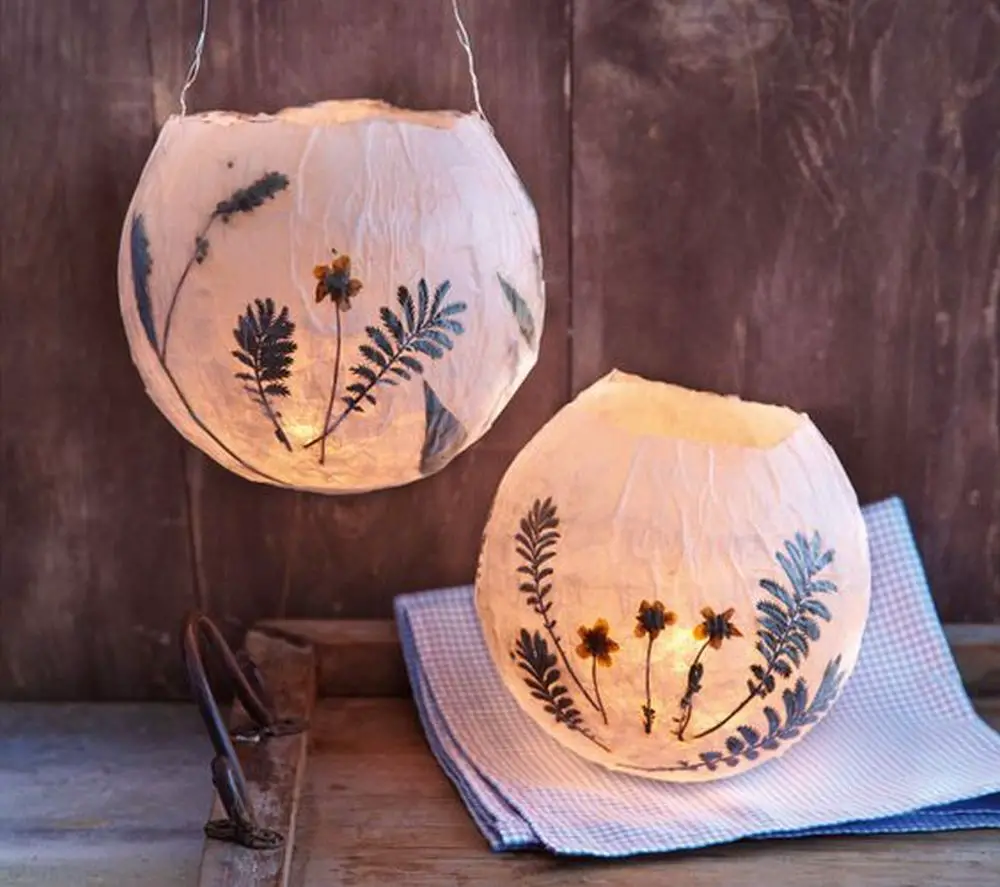
I often see these beautiful tea light holders in shops, and when I saw these tea light holders that look like a cracked egg shell, I thought it would be a fun project to put my own creative spin on.
Making these is easier than you think😋

Here's what you'll need:
Paper towels
Wood/ Crafters glue
Water
Silicone brush
Serviettes with your desired print
Balloons
Scissors
Metallic Gold paint
Battery powered Tea lights (I would not suggest using regular tea lights with these tea light holders as they are made of paper and could catch fire)

Step 1:
Start by blowing up the balloons, one for each tea light holder you want to make. Blowing them up the size you want your holder to be, I made one larger and one smaller in size.
It's a good idea to use some old newspaper to cover your working surface.

Step 2:
Next mix equal parts wood glue with water in a small glass bowel. For two tea light holders I used about 2 tablespoons glue to 2 tablespoons water. Then take the paper towel and tear them into smaller more manageable strips.

Step 3:
Use your silicone brush to brush the bottom of the balloon with your glue water mixture and then place the dry paper towel over the wet glue to stick it to the balloon. Now just continue layering the tissue paper and glue working your way about 3/4 of the way up the balloon. then continue layer the paper over each other for about 4 layers should do the trick.
Step 4:
Let them dry, mine took about two days, you'll know they're dry when their rock hard.
Step 5:
Once they've completely dried, take anything sharp to pop the balloon and let the air out.
Then using scissors cut a zigzag line across the edge, don't make it perfect make some corners bigger and some smaller.
Step 6:
Next mix a small amount equal parts glue to water ( 1 tablespoon glue to 1 tablespoon water)
Seperate your serviettes layers so you are using only the printed sheet.

Step 7:
Then wet the outside of your tea light and place the serviette with your desired print over, it's okey to fold the serviette and have some pieces overlap. just make sure you wet those areas enough with the glue mix. You can also tear or cut your serviette depending on what your print looks like to have for example clusters of designs closer to each other- like my tulip serviettes. I roughly teared around the tulip so I could have smaller white gaps between them. When the serviette is wet it's easy to tear off the remainder and smooth the serviette at the edge of your tea light holder.
Step 8:
Leave them to dry for about a day.Then use the metallic gold paint to paint the inside of your tea light. I love how the tea light reflects off the gold paint and gives it an extra special touch.
Step 9:
Once the paint has dried you can just add your tea light and you done- I'm sure using normal tea lights should be fine as long as the edges don't get to close to the flame. But with littlies in the house I use the battery operated tea lights on all the counters accessible to those curious little fingers 😋


Happy creating friends, I hope you try these when your feeling crafty one day.
Love Janine
PS- Below are some more ideas of tea light holders/ lanterns you can create.


\


Comments